They're not THAT cool.
So naturally I made one.

This looks like an honest, family-run company, so I hate to take business from them, but I just couldn't believe the prices. If you want their heavy duty drawstring and fabric, do order from them, but if you're like me and need a $2- $3 option, here it is.

Your average fabric from Joanns or whatever will run around 42" wide, so that's as big as you could make this unless you piece some fabric together, which you could do. Your playmat would then have a seam in the middle of it, but it could be ginormous. I started small with the owl fabric, and then made a large one with some striped Jersey.
To start, you need a circle of fabric. It doesn't have to be a perfect circle, just a rough one. You can trace something circular or you can do this:
Fold up a corner of your fabric to create a square and cut it out. (Similar to the way you would make a square out of a rectangular piece of paper.)

Fold it in half diagonally several times to get a little triangular shape like this.
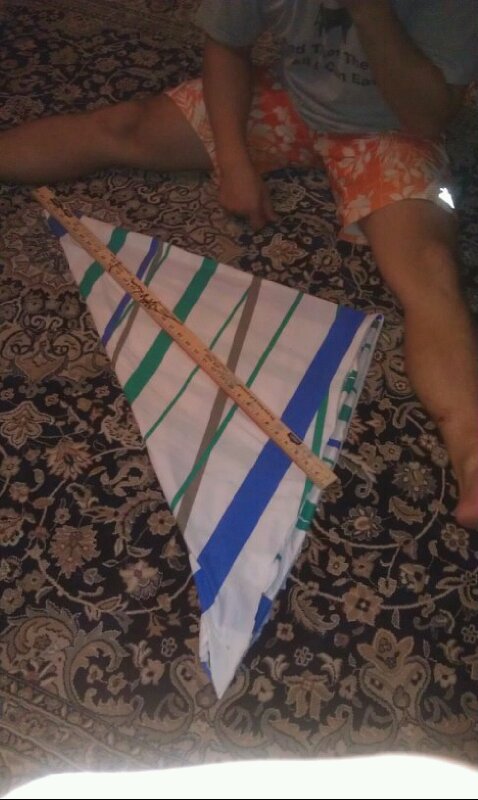
Measure from the center point to the edge at the shortest side, then move your tape (ruler, yardstick)along the fabric, marking every half inch or so, keeping your left thumb tightly down on the center point of your circle. You should have a little arc marked.

Cut along this line and unfold. It should be pretty much circular.

Then you just hem the entire edge at about a half inch, leaving a small space at the end for the drawstring to poke through. I did this without pinning or pressing, but you could press and pin first if you want it perfect. As long as you can get a drawstring through it, it will work. Even if you have to bunch it up like this in a few places, it will be fine:

I had enough scrap fabric to cut a long piece like this from the fabric, to use as the drawstring.
You can sort of see I cut it in a "U" shape ( up the right side and back down the middle) because I needed it to be nice and long and didn't want to piece it together.

Then attach a safety pin to one end and feed it through the casing you created. You'll bunch the fabric around the safety pin and slowly feel your way through to the other side.

Then lay it out flat to see if you have any excess drawstring. Keep enough to tie a knot. Tie it in a knot so the child won't lose the string inside the casing.


For a more durable drawstring, you'll want to cut it about 3 inches wide, then fold the raw edges into the center. Fold in half again and sew all the way around the edge. This will create a more finished look.
You're done!

The owl one is for my daughter's nail polish, and the other one is for blocks. I try to keep them in their various boxes, but I *might* be able to train them to play ON this mat and keep it a little more contained. Maybe :)

Fat quarters would be IDEAL for little bags like this. I'm going to make one for makeup so I can spread it out on the counter in the morning and then cinch it back up :)
Awesome! Looks like I'm heading to the fabric store LOL
ReplyDeleteyay!
ReplyDeleteNice little bitch topless in panties only sexy
ReplyDelete